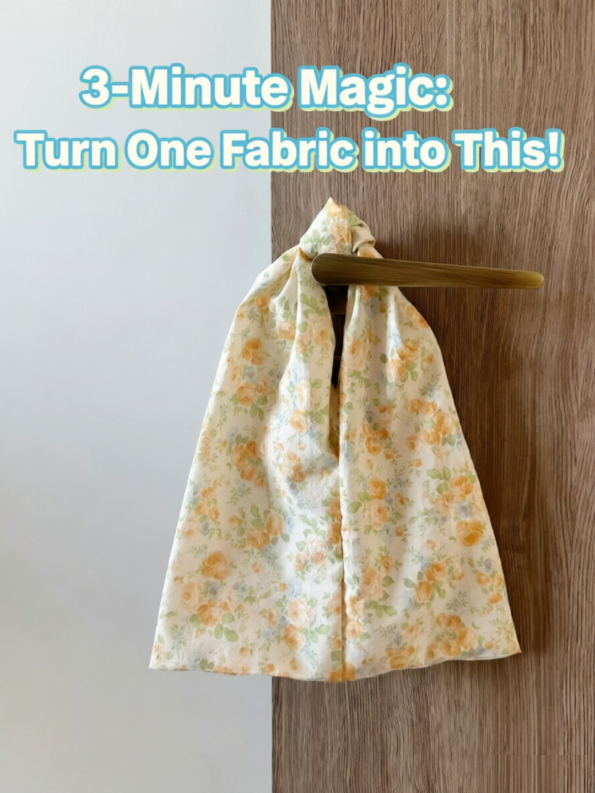
Transform a simple rectangle of fabric into a chic, functional handbag with this beginner-friendly tutorial. While it involves a few quick hand-stitches for durability, the technique is so simple you’ll finish in no time. Perfect for craft novices and seasoned makers looking for a quick project!
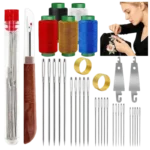
🛠️ What You’ll Need
Materials:
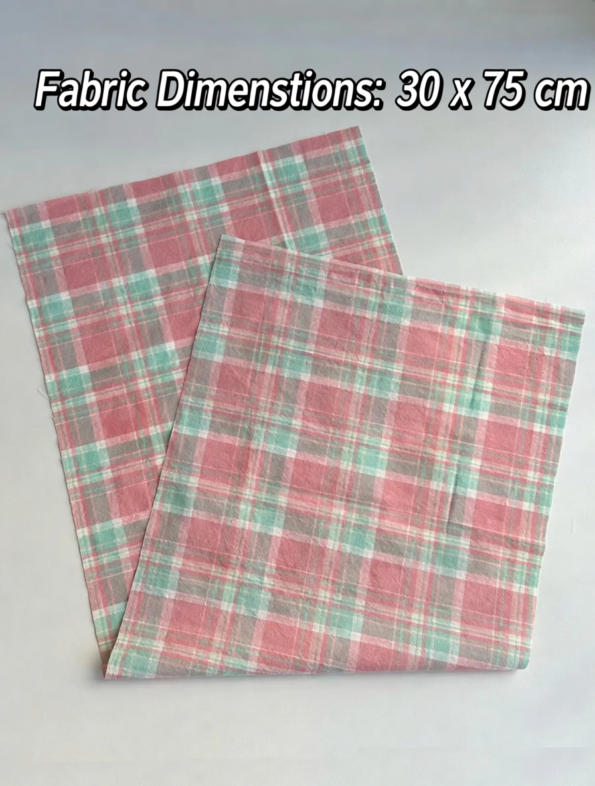
- Fabric: One rectangular piece of cotton, linen, or canvas (approx. 12″ × 30″ or 30cm × 75cm)
- Thread: Matching color to your fabric
- Needle: A sharp hand-sewing needle
- Tools:Scissors, ruler or measuring tape, straight pins or fabric chalk
🧵 Need Quality Tools?
Get everything you need for this project—from precision rulers to marking clips and premium needles—at YACrafts. Elevate your DIY experience with our curated selection!
💡 Pro Tip: Pre-wash and iron your fabric before starting. A crisp, wrinkle-free surface makes measuring and folding much easier!
📝 Step-by-Step Instructions
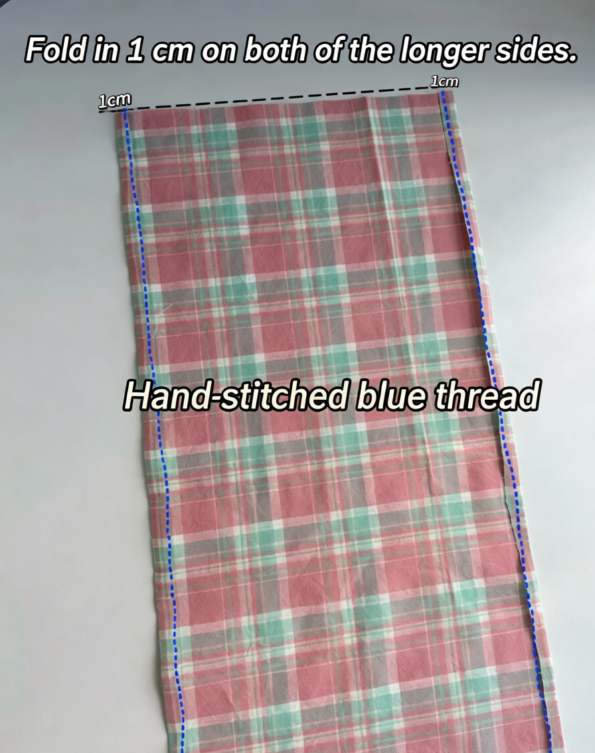
Step 1: Hem the Long Edges
Lay your fabric flat on a clean surface.
- Fold: Fold both long edges (the 30″/75cm sides) inward by about ½ inch (1cm).
- Stitch: Hand-sew a simple running stitch or slip stitch along the folded edge to secure it. This prevents fraying and gives your bag a polished look.
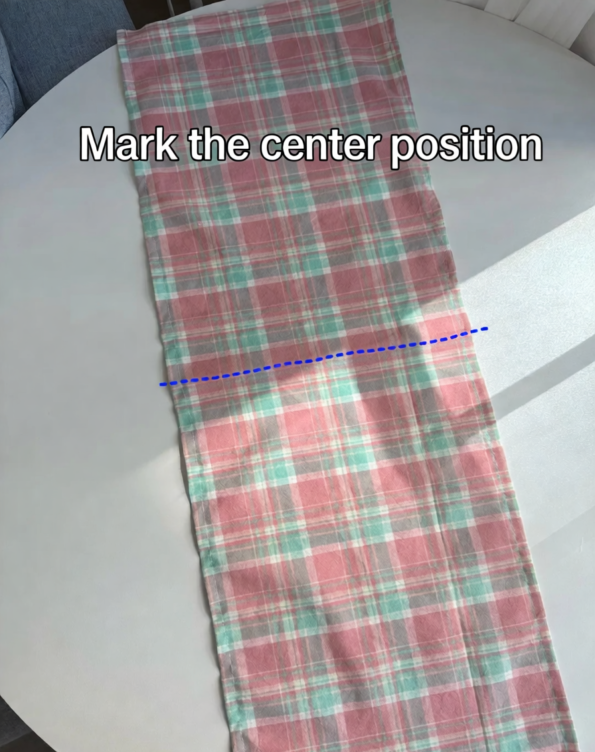
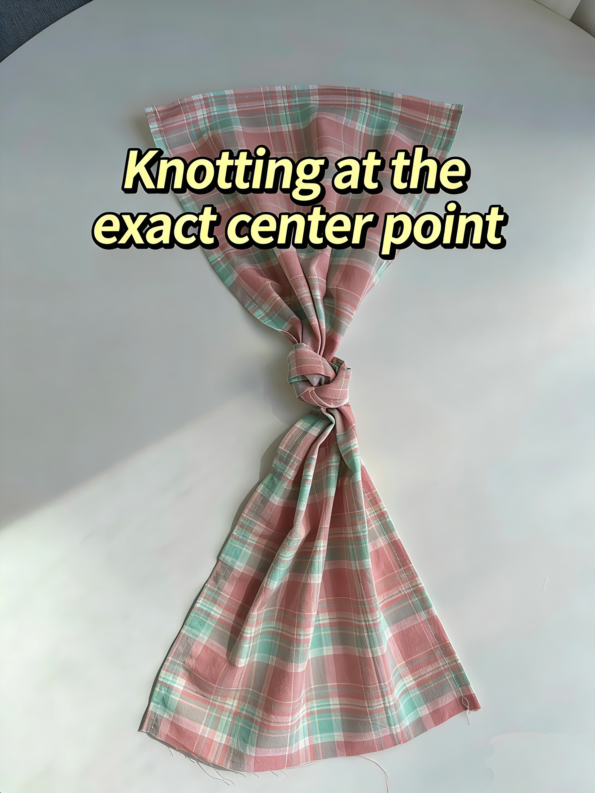
Step 2: Mark the Center
Lay the hemmed fabric flat again.
- Measure: Find the exact center of the long edge (at 15 inches or 37.5cm).
- Mark: Use a straight pin or a small dot of fabric chalk to mark this spot clearly. This is the anchor point for your bag’s shape.
- Recommended Tools: Bamboo Ruler | Marking Clips
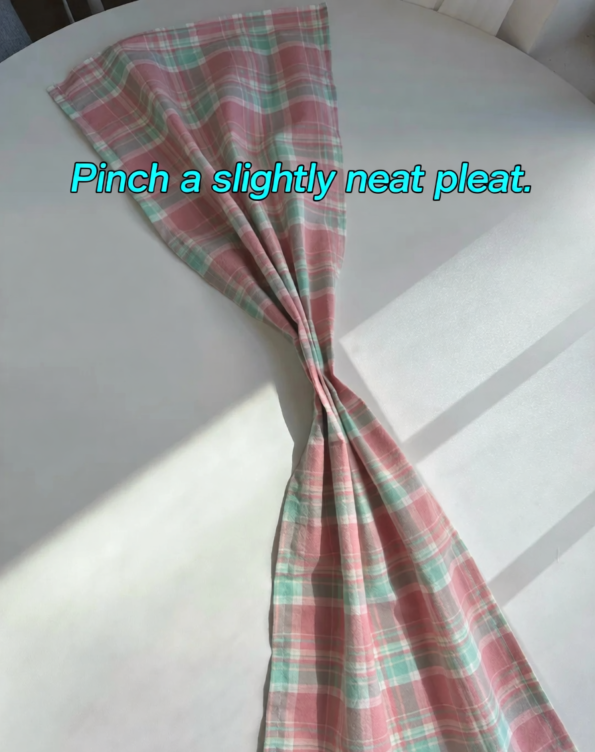
Step 3: Create the Pinch Pleat
Locate the center mark you just made.
- Pinch: Grab the center point between your thumb and forefinger. Lift it vertically about 3–4 inches (7–10cm) off the table.
- Gather: As you lift, let the surrounding fabric naturally drape and fold downwards, creating a radial, cone-like shape. Adjust the folds with your other hand until they look even and symmetrical. This forms the base of your pouch.
Step 4: Secure with a Knot
Hold the gathered shape firmly.
- Tie: Directly below your fingers, at the base of the gather, tie a tight overhand knot using the fabric itself (if the fabric allows) or a matching cord/thread wrapped around the gather.
- Note: If using a separate cord, wrap it tightly around the gathered neck and tie a double knot. This acts as both the closure and the handle attachment.
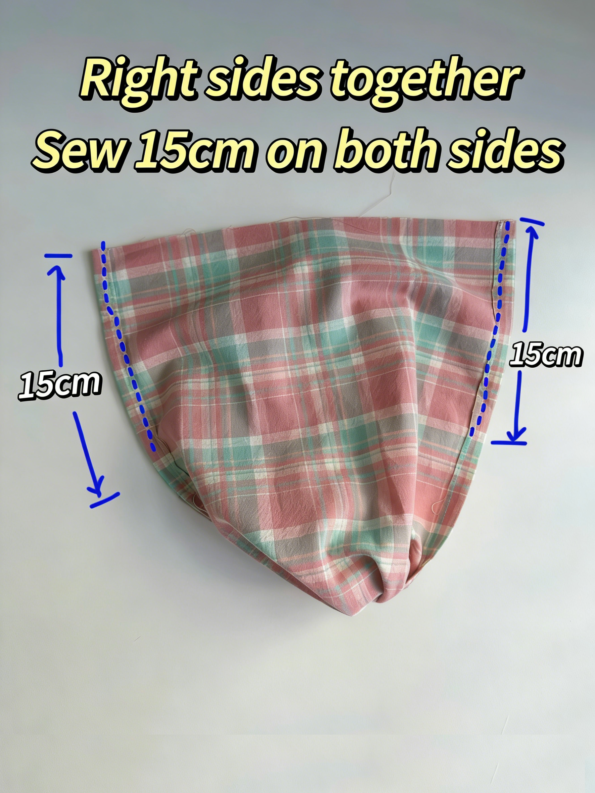
Step 5: Sew the Side Seams
Your bag now looks like an open funnel. It’s time to create the body.
- Align: Fold the bag in half so the raw short edges meet (right sides together if you hemmed neatly).
- Stitch: Starting from the bottom open edge, hand-sew up each side for about 6 inches (15cm). Leave the top portion open—this is your bag’s opening.
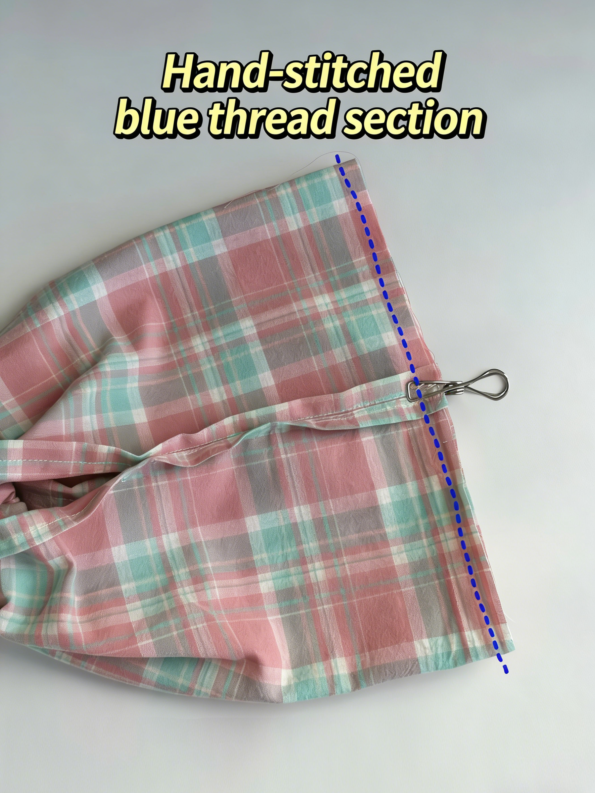
Step 6: Reinforce the Stress Points
Before turning the bag right-side out, let’s make it durable.
- Reinforce: Look at the top end of your side seams (where the stitching stops). Backstitch here several times to reinforce the area where the handle tension will be.
- Tip: Use matching thread so these structural stitches blend in seamlessly.


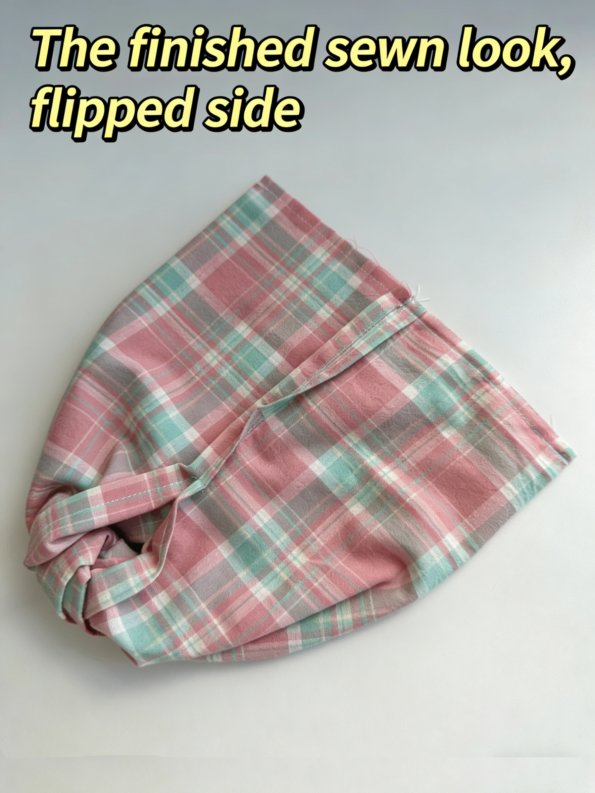
Step 7: Turn and Press
- Turn: Gently turn the bag right-side out through the top opening.
- Shape: Poke out the corners gently with your fingers or a blunt tool (like a chopstick) to define the shape.
- Press: If needed, give it a quick press with an iron on a low setting to smooth out any creases. Your bag is now ready to use!
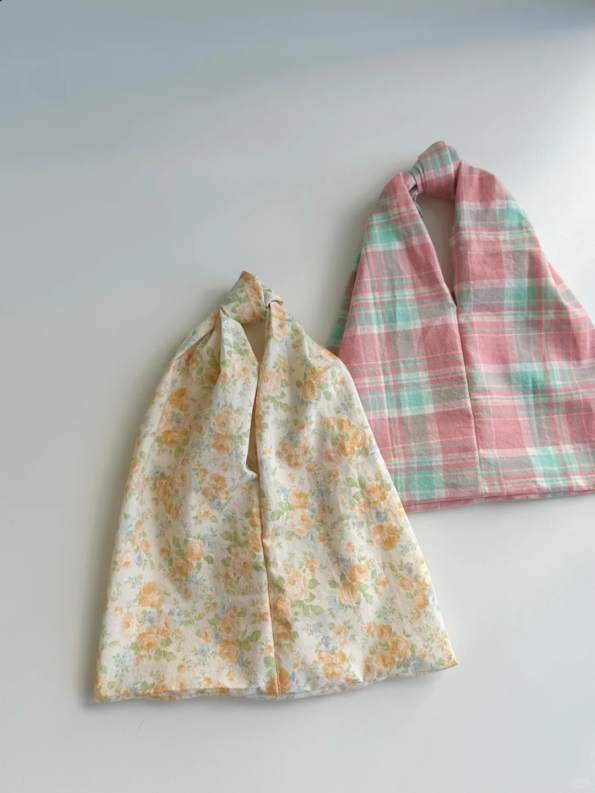
✨ Why You’ll Love This Bag
This “Pinch-Pleat Tote” is more than just a quick craft; it’s a versatile accessory:
- Endless Possibilities: Use it as a unique gift wrap, a jewelry pouch, a beach essentials carrier, or a stylish mini-handbag.
- Fabric Freedom: Experiment with different textures! A silk scarf creates an elegant evening clutch, while heavy canvas makes a sturdy grocery tote.
- The Secret to Success: The key lies in Step 3. Taking a moment to ensure your pleats are evenly distributed before tying the knot guarantees a balanced, professional-looking bag.
Although this version includes hand-sewing for extra durability, the process remains incredibly fast. With a little practice, you can whip one up in under 10 minutes—a perfect project for a relaxing afternoon or a last-minute handmade gift!
DIY#Handmade #Sewing